Thursday, October 31, 2013

Exporting Drivers from Windows

I stumbled across a great application today called DriverMax - a free application which lets you export drivers from Windows based operating systems.  This tool is handy when you are having difficulty tracking down an unknown driver but have it readably available already installed on another workstation.  With this tool you can simply export the driver from one computer to another.

The latest version of DriverMax as of this writing is version 7.21 which can be downloaded from the following URL:

http://small.drivermax.com/soft/dmx/drivermax.exe

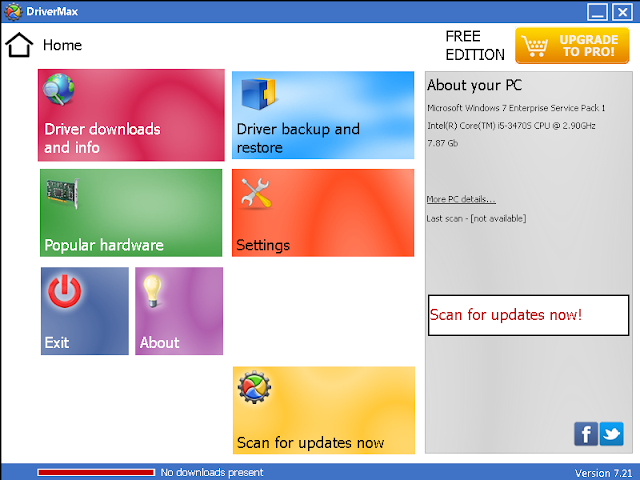
Once installed you will be presented with the following splash screen.  Simply click "Driver backup and restore"


Next select "Backup drivers".


Select the drives you wish to export from the operating system such as display, network or audio drivers.  In my case I have a HP USB mouse/keyboard which is not being recognised by Windows 7 x64 (weird) so I want to move the drivers from a PC which I know have the correct drivers for this device.

I selected "USB Input Device" (both the Mouse and Keyboard both use the same driver).


Next under the backup button select "Backup selected drivers to a specified folder".  Select the folder and then select backup.


Under the folder specified the drivers will be backed up to the respective location as shown in the following screenshot with the driver ini file and system files.


Monday, October 28, 2013

The security certificate presented by this website is not secure - IE10

I had a problem with Internet Explorer 10 when going to a untrusted site in my case, my local vCenter server to download vSphere, I got an error "The security certificate presented by this website is not secure".  Usually you are able to click "Continue to this website (not recommended)" however in Internet Explorer 10 this option was no longer available.


After some research I came across Microsoft KB2661254 which mentions this is due to the minimum key length of the certificate being less then 1024 which in this case it will be blocked.  This Microsoft KB article can be found on the following site:

http://support.microsoft.com/kb/2661254

After reviewing the default VMware certificate generated on the vSphere server, I verified that the certificate key length was only 512 as shown in the following screenshot.


As a result following the advice from Microsoft on KB2661254 I lowered the required certificate key length to 512 using the following command from an administrative command prompt:

certutil -setreg chain\minRSAPubKeyBitLength 512


After making this change, I was able to continue past the certificate warning as normal and download my vSphere client.

Friday, October 25, 2013

SCCM Deployment Failure 0x80070002

During a new SCCM 2012 SP1 deployment for a customer, when deploying a WIM file to a new workstation the following error was experienced:

Task Sequence "Task Sequence Name" has failed with the error code (0x80070002). For more information, contact your system administrator or helpdesk operator.


This error popped up as soon as the "Apply Operating System" action kicked off within the task sequence.  The "Apply Operating System" task attempts to download the Windows 7 Enterprise WIM file from the closest deployment point, however will experience access issues if no network access account has been configured yet.  The operating system deployment process running of PXE boot requires access back to SCCM to download the operating system WIM file.

To configure the network access account, under Administration, Sites, Configure Site Components, select Software Distribution.


On the Network Access Account tab, supply SCCM with a network access account which has permissions to connect to the distribution point repository.


Hope this post has been helpful.

Thursday, October 24, 2013

Error Starting WDS Service on SCCM 2012 SP1 Server

I ran into an issue where I was unable to start the WDS service on a newly installed SCCM 2012 SP1 server running on Windows Server 2012.  The following errors were experienced in the application log on the SCCM 2012 distribution point server.

Log Name:      Application
Source:        WDSServer
Date:          25/10/2013 12:30:44 PM
Event ID:      257
Task Category: WDSServer
Level:         Error
Keywords:      Classic
User:          N/A
Computer:      sccm2012.domain.internal
Description:
An error occurred while trying to start the Windows Deployment Services server.

 Error Information: 0x906


Log Name:      Application
Source:        WDSMC
Date:          25/10/2013 12:30:45 PM
Event ID:      594
Task Category: WDS Multicast Server
Level:         Error
Keywords:      Classic
User:          N/A
Computer:      sccm2012.domain.internal
Description:
The Content Provider WDSBOOT loaded from C:\Windows\system32\wdsbcp.dll failed to initialize.
 

Error Information: 0x906


Log Name:      Application
Source:        WDSMC
Date:          25/10/2013 12:30:45 PM
Event ID:      603
Task Category: WDS Multicast Server
Level:         Error
Keywords:      Classic
User:          N/A
Computer:      sccm2012.domain.internal
Description:
The Content Provider WDSBOOT failed to initialize. The provider is marked as critical. WDS Multicast server will fail to start.

 Error Information: 0x906


Log Name:      Application
Source:        WDSServer
Date:          25/10/2013 12:30:45 PM
Event ID:      513
Task Category: WDSServer
Level:         Error
Keywords:      Classic
User:          N/A
Computer:      sccm2012.domain.internal
Description:
An error occurred while trying to initialize provider WDSMC from C:\Windows\system32\wdsmc.dll. Windows Deployment Services server will be shutdown.

 Error Information: 0x906


This was resolved by initialising the WDS server using the following command.  Generally WDS automatically initialises itself however for an unknown reason on this SCCM server it did not initialise as expected.


Wednesday, October 23, 2013

Removing a Corrupt Folder from a Mailbox in Exchange

Today a customer had a corrupt folder in their accounts mailbox called "Contractors and Payments" which they were unable to delete.  When attempting to delete the folder in Outlook, they received the following error message:

Cannot delete this folder. Right-click the folder, and then click Properties to check your permissions for this folder. See the folder owner or your administrator to change your permissions. Outlook is synchronizing local changes made to items in this folder. You cannot remove this folder until the synchronization with the server is complete.


When attempting to delete this folder using MFCMAPI using a hard delete or soft delete, the following error was experienced:

Error:
MAPI_E_INVALID_ENTRYID==0x80040107
Function IpParentFolder->DeleteFolder(IpItemEID->cb, (LPENTRYID) (IpItemEID->lpb, lpProgress ? (ULONG_PTR)m_hWnd : NULL, lpProgress, ulFlags)
File MsgStoreDIg.cpp
Line 950


The folder also could not be removed using Outlook Web App.

To remove the corrupt folder, the New-MailboxRepairRequest was executed against the accounts mailbox with the corruption types set as ProvisionedFolder, SearchFolder, AggregateCounts and FolderView.

New-MailboxRepairRequest -Mailbox accounts -CorruptionType ProvisionedFolder,SearchFolder,AggregateCounts,Folderview


As this Exchange Server is running Exchange 2010, the Get-MailboxRepairRequest command does not exist.  This command was introduced in Exchange 2013 for viewing the status of a mailbox repair task.  However in Exchange 2010 we can still view the repair request using Windows Event Viewer.

We can see here the mailbox repair request started with the corruption types specified above.


The next event log shows the repair completing successfully.

 
Next verify that the corrupt folder has been successfully removed using Outlook Web App.  It should be gone.  For it to disappear in Outlook you need to delete the local cache "OST file" or recreate the users Outlook profile.  This is because the corrupt folder is still cached on the local workstation.
 
After recreating the Outlook profile we can now see that the corrupt folder is gone for good!


Monday, October 21, 2013

Windows PE cannot start because the actual SYSTEMROOT directory (X:\Windows) is different from the configured one (X:\$windows.~bt\Windows)

I ran into the following error message on a new SCCM 2012 SP1 server using the default boot.wim files which come on the Windows 8 installation media.

Windows PE cannot start because the actual SYSTEMROOT directory (X:\Windows) is different from the configured one (X:\$windows.~bt\Windows).  This can be configured from dism.exe with the /set-targetpath command.  Please consult the documentation for more details.

Press the OK button or close this message to reboot.

 
After doing a little research this is a common problem when using the default boot.wim WinPE 4.0 files from the Windows 8 installation media.  You have two options to correct this, the first is using DISM and using the /set-targetpath command to change the command to X:\WINDOWS as per the error message above.  The second is using the boot.wim files which come with the Deployment and Imaging Tools.  Simply load the Deployment and Imaging Tools Environment shell and run the following commands:
 
copype x86 D:\Sources\OS\BootFiles\x86
copype amd64 D:\Sources\OS\BootFiles\amd64

Here is an example of what it will look like as it extracts:


The boot.wim file will be located under x86\media\sources for the respective operating system architecture you extracted, as shown in the following screenshot:


If you use the boot.wim files from the Deployment and Imaging Tools you will not experience this problem and with any luck, PXE clients should boot straight into the SCCM configuration screen.

Make sure you don't forget to Distribute the boot images and update the distribution points.

Note: Make sure you restart the Windows Deployment Services Server service after changing boot files.


PXE Boot aborted. Booting to next device...

The following error was experienced when performing a PXE boot from a newly installed SCCM 2012 SP1 server.

Architecture: x64

The details below show the information relating to the PXE boot request for this computer.  Please provide these details to your Windows Deployment Services Administrator so that this request can be approved.

Pending Request ID: 2

Message from Administrator:
Please wait.  SMS is looking for policy.

PXE Boot aborted.  Booting to next device...


To resolve this problem you need to distribute the boot image to the deployment point.  First distribute the content then update the distribution points.


SCCM 2012 sp1 0xc000000f PXE Error

I was having an issue with SCCM 2012 SP1 with a PXE boot problem.  When workstations attempt to boot from my SCCM 2012 deployment point they receive the following error:

Recovery

Your PC needs to be repaired.
The Boot Configuration Data for your PC is missing or contains errors.


File: \boot\bcd
Error code: 0xc000000f


In the SMSPXE.log file on the SCCM Deployment point server the following error is being experienced which is spammed over and over.

&lt![LOG[Warning: Matching Processor Architecture Boot Image (0) not found]LOG]!&gt&lttime="16:59:32.682-660" date="10-21-2013" component="SMSPXE" context="" type="2" thread="2612" file="pxehandler.cpp:1542"&gt

Now I only have a x64 boot.wim file which I have deployed to my deployment point.  This boot.wim is the default x64 one taken of a Windows 8 DVD Media.  From my reading on the following forum thread, apparently this is a known problem with SCCM 2012 SP1.  What I have leant from the following forum thread is you MUST HAVE both a x64 and a x86 boot image deployed to your deployment point servers, even if your only using x64 like in my case.  This is also in alignment with the error which I am receiving in the SMSPXE.log file "Matching Processor Architecture Boot Image (0) not found" which would hint there is no x86 boot image deployed.

Please see this forum thread:

http://social.technet.microsoft.com/Forums/en-US/5b0db982-42fa-4ac3-b617-27d5b2ac24fa/sccm-2012-sp1-upgrade-pxe-boot-error-0xc000000f-bootbcd?forum=configmanagerosd

Now I went to upload a 32bit boot image from a Windows 8 32bit edition media however when ever I upload a 32bit media, I receive the following error:

"You can not import this boot image.  Only finalized boot images are supported.  For more information press F1."


It is important to note that 64bit Windows 8 boot media adds without a problem.
Also important, I received the following error when attempting to add a Windows 7 x64 boot media.  From my research I found that SCCM 2012 no longer supports the old WinPE 3.0 (which comes with Windows 7) and as a result you need to use a Windows 8 boot.wim file.  I blogged these findings here:

http://clintboessen.blogspot.com.au/2013/10/you-can-not-import-this-boot-image-only.html

The Resolution

To resolve this issue, the latest cumulative update must be installed on the SCCM 2012 SP1 server.  As of this writing the latest cumulative update is CU3 which is available from the following website:

http://support.microsoft.com/kb/2882125

This hotfix as of this writing must be requested from Microsoft in which they email you a link to download the hotfix.  Apply this update to SCCM servers in your central administration site, primary site, secondary site, providers and configuration manager consoles.

After installing this update rollup, I was able to successfully add the Windows 8 32bit boot image from a Windows 8 32bit media.


Sunday, October 20, 2013

You can not import this boot image. Only finalized boot images are supported. For more information press F1.

Using System Centre Configuration Manager with SP1 when attempting to add the Windows 7 with SP1 boot image "boot.wim" from the sources folder on a Windows 7 media which was copied to my SCCM server, I received the following error:

You can not import this boot image. Only finalized boot images are supported. For more information press F1.

When researching the error, this error is usually experienced when a custom boot image is made with custom drivers usually using third party tools other then the Windows Automated Installation Kit (WAIK) DISM.exe tool provided by Microsoft.  However this was not the case, I was just trying to upload the default boot.wim from a Windows 7 media.


After a good 10 minutes of digging I found a post on the Windows Noob forums by bennettjd which mentions System Centre Configuration Manager with SP1 does not support Windows 7 boot images - only Windows 8.

http://www.windows-noob.com/forums/index.php?/topic/7571-sccm-2012-boot-image/

After trying again with a Windows 8 boot image, it worked successfully.


 Hope this post helps you if you got caught out on this like me!

Monday, October 14, 2013

Where is the System Centre Configuration Manager Console on Windows Server 2012?

You have just installed SCCM 2012 on a new Windows Server 2012 computer having configured SQL, installed various components from the Assessment and Deployment Kit and a few other pre-requisites.  Now you wish to begin configuring SCCM using System Centre 2012 Configuration Manager console.

Problem is where is the console?  It does not get installed by default and there is little documentation online on how to install it.  I had to find the installer myself by manually browsing through program files.

The SCCM Configuration Manager console MSI installer can be found under:

C:\Program Files (x86)\ConfigMgr10\AdminconsoleSetup\{BCB4C126-7BEB-4938-B32F-FC73E17BD41E}\Adminconsole.msi

Note: In the SCCM 2012 Release Candidate the console was automatically installed which makes some online documentation even more confusing.


Simply launch this installer on the SCCM and follow the prompts.


Sunday, October 13, 2013

Limit the Amount of Memory used by an SQL Instance

By Default, an instance of SQL will attempt to use every free MB of memory it can get its hands on.  This is by design, the more database records available in memory, the lower the disk I/O activity.  However there are times when you may want to limit the amount of memory utilised by an SQL Instance.  For example you may have an SQL Clustered environment running AlwaysOn Availability which is responsible for hosting multiple SQL Instances.  In this case you may what to limit the memory utilisation of each instance.  Another scenarios may exist where you are monitoring your servers available memory using a monitoring product such as SCOM and configure the monitoring product to trigger an alert when 90% memory utilisation on a server is hit.  As SQL always utilises all available memory, this will cause many false alerts.

How do we do this?

First you need to connect to the SQL Instance you wish to configure using SQL Management Console, in my example it is SQL 2012.

Next right click the instance (in my example my SQL Instance is called SCCM) and click Properties.


On the left of the properties screen click Memory.  There will be a value by default under Maximum server memory (in MB) set to 2147483647 is equivalent to 2048TB of memory (no server has this!).


Set it to something more practical like 1024MB.  Please note if you  have a busy SQL application you will need to assign an appropriate amount of memory for the given application.


How to Change SQL Instance Collation

In this post I am going to show you how to change SQL 2012 database collation SQL_Latin1_General_CP1_CI_AS, the requirement for System Centre Configuration Manager (SCCM) 2012.  Changing database collation means all data in the database will be lost - make sure you know what your doing.

I needed to change the database collation for my SCCM instance in relation to an SCCM installation error:

Configuration Manager requires that you configure your SQL Server instance and Configuration Manager site database (if already present) to use the SQL_Latin1_General_CP1_CI_AS collation, unless you are using a Chinese operating system and require GB18030 support.

To change the database collation simply run the setup.exe from the SQL Installation media again but in quite mode.  The command you need to run is:

setup /q /action=rebuilddatabase /instancename=sccm /sapwd=P@ssw0rd /SQLCollation=SQL_Latin1_General_CP1_CI_AS /SQLSYSADMINACCOUNTS=domain\administrator


/q – perform silent installation

/Action – [RebuildDatabase ] Rebuilding the system databases to change the collation name

/INSTANCENAME – Name of the instance the collation has to change
- If Default Instance then “MSSQLSERVER”
- If Named Instance “Named Instance Name”

/SAPWD – Provide new password for SA login
 - Enable SA Account if it Disabled setup with Strong Password.

/SQLCollation – Provide the new collation name of SQL Server

/SQLSYSADMINACCOUNTS – Provide account name which has admin rights in sql server.

SQL 2012 Not Listening on TCP1433

Previous releases of Microsoft SQL such as 2008 R2 use to listen on TCP1433 for incoming SQL traffic.  Now in SQL Server 2012, TCP1433 is no longer utilised.  This can be shown using the netstat command as shown in the screenshot below.

SQL Server 2012 now uses dynamic ports for each SQL instance which is subject to change.  SQL client applications discover the which port the instance is now running on by querying UDP 1434, the SQL Browser Service which returns the correct port.  My SQL Server instance is currently running on TCP25463 and the Browser Service tells the client to connect to this port.

This is similar to the way the RPC Endpoint Mapper works for RPC based Microsoft applications.  In terms of network lockdown and ACL rules, the network engineers are usually unhappy about this approach as it means they need to keep the entire port range open.


Friday, October 11, 2013

How to view the NAT Translation Table on a Cisco Router

To view the NAT translation table on a Cisco router to ensure it is not overloaded, the command you want to use is:

"show ip nat translation"

Run this command from enable mode.  This command is useful especially when wanting to see if your  NAT tables are getting slammed by a large number of web connections from potential miscellaneous software on your network.


Another command which is useful when identifying if your router is overloaded from  NAT is to check the memory.  This can be viewed with the "show mem" command.


Thursday, October 10, 2013

How to determine number of users connected to CAS Server?

I received an email today from someone asking me how to determine the number of users logged onto a CAS server so I decided to blog the answer.  There is a Powershell command to identify the number of connections to an Exchange mailbox server, "Get-LogonStatistics" but none for viewing the number of connections to a client access server.

For Exchange client access servers you need to look elsewhere, Windows Performance monitor.  From here we can easily get a telly of the number of users connected to our Exchange client access server.  You can see in my lab environment I currently have 2 users connected through RpcClientAccess (Direct RPC or RPC over HTTPS) and no Exchange OWA users.

To get to performance monitor from a run prompt, type "perfmon" then add the counters as in the screenshot below.


Looking at the user count on each CAS server can be useful especially when you have a bunch of CAS servers in a farm with load balancers in place, you want to make sure the users are being distributed evenly across your CAS servers.

If you want to encorporate these performance monitors into PowerShell code, this is also achievable and has already been done.  For more information on this please refer to the following blog posts:

http://www.mikepfeiffer.net/2011/04/determine-the-number-of-active-users-on-exchange-2010-client-access-servers-with-powershell/

http://oxfordsbsguy.com/2013/06/20/powershell-identify-the-number-of-users-connected-to-a-exchange-2010-cas-server/

Tuesday, October 8, 2013

Changing a Forgotton Root Password in Linux

I built a Linux server a few months ago for monitoring purposes for a customer, however I failed to write the root password down - doh!  In this post I will be showing you how to change the root password for Linux systems using GRUB boot loader.  If your running LILO (LInux LOader), this how to will not work for you.

The Linux distribution used in this demonstration is CentOS release 5.9 which can be viewed using the "cat /etc/*-release" command, a quick way of finding the distribution of a unix/Linux operating system.

Now to recover a lost root password, you must enter a operating mode known as "single user mode".  This is an environment which does not require login details to logon to the system which hence enables us to change the password of the root account.

Now the first ting you need to do to enter single user mode is at the grub boot screen, press "a" to enter "append" mode.  The grub boot screen in later versions can be graphic interfaces, however on older distributions of Linux it is generally text based.  In my version of CentOS server, my grub screen is a GUI and has a pretty pattern in the background.

This is where you press "a" to get into that append mode.  Be quick as this screen moves pretty fast.


Next pick select the Kernel you wish to boot, there can be multiple here especially if you have done Kernel upgrades in the past.  If you are not sure, select the latest version by highlighting it using the up and down arrows.

Once you have selected the version you want, press "e" to enter "edit mode".


Now in edit mode, you want to select the entry that has "kernel" in front of it.

You will have ro root=something, depending on your Linux distribution/installation this can look different.  For example in another installation this reads:

ro root=/dev/sda1

In this installation it reads:

ro root=/dev/VolGroup00/LogVol00

What you need to do is append the word "single" at the end, all lowercase to instruct Grub to boot "single user mode".  I will type the entire thing out:

kernel /vmlinuz-2.6.18-348.1.1.e15 ro root=/dev/VolGroup00/LogVol00

needs to become

kernel /vmlinuz-2.6.18-348.1.1.e15 ro root=/dev/VolGroup00/LogVol00 single

To make the change to the kernel boot line hit "e" to "edit" the entry.


Now in the screenshot you see I have appended the word single a the end of the line.  Sorry you cant see the entire command, it has gone onto another screen due to my screen resolution being so small.  The full path looks like this:

kernel /vmlinuz-2.6.18-348.1.1.e15 ro root=/dev/VolGroup00/LogVol00 single

After making the change press ENTER.


In the screenshot below you can see that I have appended the word "single".  Again it cuts out due to the screen resolution being so small but you can see the "s".

To boot the new kernel boot command, press "b" for "boot".


The system will now boot straight to single user mode and you will be presented straight away with a command prompt.

To change the root password at the command prompt, type:

passwd root

Enter the new password for your system.  After you have changed the password type "reboot" and hit enter to reboot the system.


I hope this post has been helpful.